SPOTIO's My Filters is an intuitive, efficient, and configurable way for users to create and save custom views for both web and mobile. This customizable feature to better refine search results across maps, dashboards and reports, as well as enhanced map colorization for easier navigation.
Why My Filters?
Every record inside of SPOTIO at any given time can have 40+ data points associated with it. These include things like:
- Contact info
- Updated dates
- Assigned users
- Location information
- Custom field details specific to that account.
With this amount of data for every record, information inside of a SPOTIO account can get overwhelming quickly and that's where My Filters comes into play.
Filterable Data
Within both the Web and Mobile versions of SPOTIO, there are several options that users have to create filters from. For each of these options, users are able to select from multiple fields within the selection menu, and are also able to add multiple fields together into a single saved filter.
Example: What if a user wanted to look at only records that fall into a certain territory AND were created by a specific user AND were created during a specific timeframe?
All that is required is adding all of those options to the same filter and it would adjust the data being displayed accordingly.
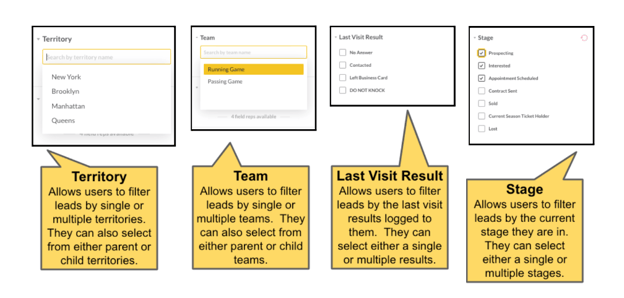
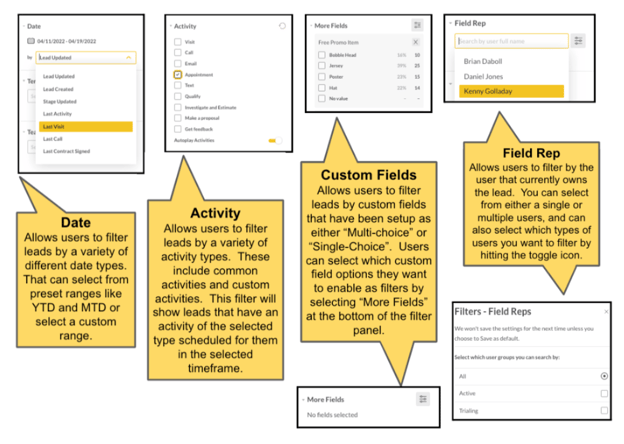
Below are all of the different data types that are able to be added to a filter in SPOTIO:
Filters on Web
The Web Filter Panel
The filter panel is available across all icons in the gray navigation bar, with the exception of Settings.
To access the filters panel on SPOTIO web, click on the white vertical bar that states Show filters. The bar will highlight green when you hover over it.
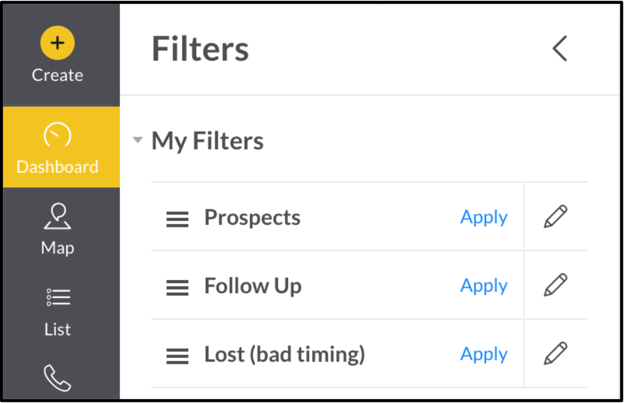
My Filters
When accessing the filters panel on the web, all saved filters appear at the top, under the section for My Filters. Next to each saved filter, there's a button to Apply the saved filter, a pencil icon to edit the saved filter, and a 3 line icon to rearrange the order in which saved filters appear.
Creating New My Filters on Web
To create a My Filter, select the desired criteria from the filters panel. The option to save My Filter will be available once at least one criteria option is selected.
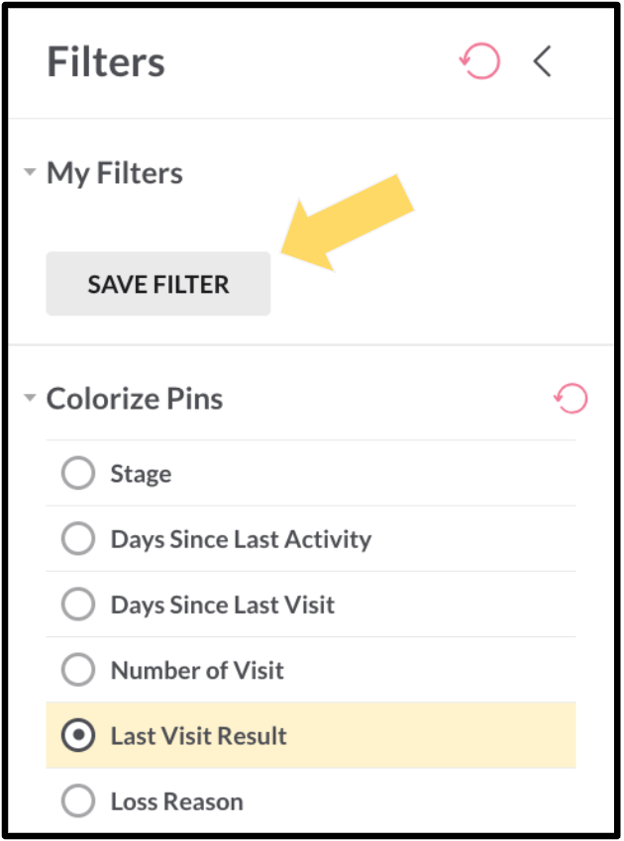
In addition to selecting your filtering options you will also be prompted to select your "Colorization" choice. This will be the color coding option you want your records to be displayed as, by default, in the Map view of SPOTIO when you apply this filter. (Account Admins, looking to set the default map colorization value for your team? Check out this article for a step by step guide on Colorization Customization and how to adjust colorization settings.)
To create a new My Filter on the web app:
- Tap into the Filters panel to the left of the map view.
- Apply the new filter criteria you are wanting to use for that filter.
- Click Save Filter.
- Enter a Name for your filter.
- Hit Save to complete.
Filters on Mobile
The Mobile Filter Panel
The filter icon is always visible in the mobile app in the top right corner.
When no filters are applied, the filter icon will be a black color. Once a filter is applied, the icon will change to a red color.
After tapping this icon, users can select a new filter criteria, reset current filtered criteria, or save/access My Filters.
It is important to note that filters applied on Mobile will stay applied as a user switches between sections of the app. The only way to reset or adjust a filter once it's applied is to tap back into the filters panel.
My Filters
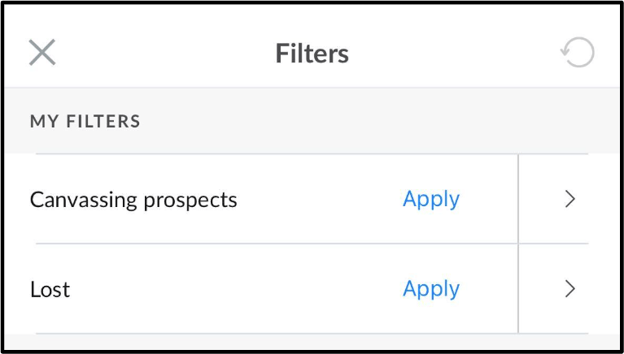
When accessing the filters panel on the mobile, all saved filters appear at the top, under the section for My Filters. Next to each saved filter, there's a button to Apply the saved filter. You can also click the arrow to rename or delete a filter. Hit Save if changes have been made.
Creating New My Filters on Mobile
To create a My Filter, select the desired criteria from the filters panel. Just like on the web, the option to save My Filter will be available once at least one criteria option is selected.
To create a new My Filter on the mobile app:
- Tap into the Filters icon in the top right corner.
- Apply the new filter criteria you are wanting to use for that filter.
- Click Save Filter.
- Enter a Name for your filter.
- Hit Save to complete.
FAQs
Can you share your My Filters with other users?
Yes, you can share filters. There are many options on how to do so. You can read more in the Shareable Filters knowledge base article.